Computer Science 105 Lab 8: Applets, Graphics, and Interaction
Due 5:00pm April 11, 2003
Objectives and Overview: This lab introduces interactive program
design by providing an introduction to applets, graphics, and the idea
of programming for human-computer interaction. Several new classes of
objects are used in interactive programming - buttons, choices (menus),
scrollable text areas, user-writable text fields, and mouse actions. The
details of declaring and using objects in these classes appear in the document Interactive Java Programming, which
you can use as a reference.
The purpose of this lab is to become familiar with the idea of applets
and interaction, and then to design a simple user interface in which the
user can draw stick figures out of basic shapes like ovals, rectangles,
and lines. That is, your program will simulate a very primitive interactive
drawing tool like those used by architects, graphic designers, and engineers.
Part 1 -- Exercise a Simple Applet
To introduce the functionality of these new objects, the java program
Scribble.java appears in the CS105 (Tucker) -> Scribble
folder. Drag this entire folder to the desktop, and then open it...
you should see the following files:
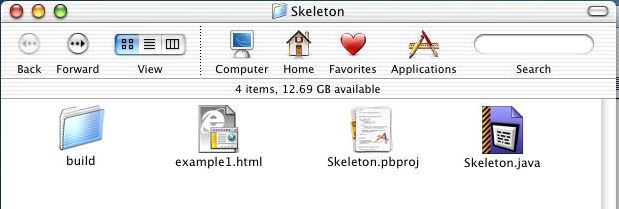
Double-clicking the icon Scribble.pbproj will start your Java programming
session and open the following window:

In the right-hand window is the Java program listing, and on the left is
other information to be discussed later.
This situation is similar to the C++ programming you did in the last lab.
The first step is to compile the program to check for syntax errors.
This is done by selecting the Build -> Build menu. If
there are errors, they would have been listed in a separate window and you
could have corrected them in the Java program listing.
The second step is to run the program, which is done by selecting the Build
-> Build and Run menu. This should produce the following new
window on the screen:
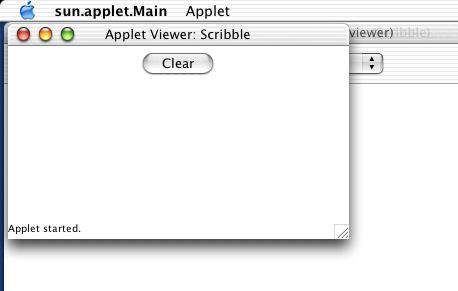
Actually, there are two windows here, one on top of the other. In
the background is the standard "Applet viewer" which manages the viewing
of any Java applet. In the foreground is the actual window produced
by the Scribble.java program. This is the interaction that
the program has produced. So now you have a chance to play with this
interaction by dragging the mouse around the screen and selecting the "Clear"
button.
Part 2 -- Exercise Another Applet
Moving to a more interesting programming situation, the Java program
Skeleton.java appears in the CS105 (Tucker) -> Skeleton
folder, which you should copy in its entirety to the desktop. Now
open that folder on the desktop, double-click Skeleton.pbproj, and
select Build -> Build and Run to obtain the following applet:
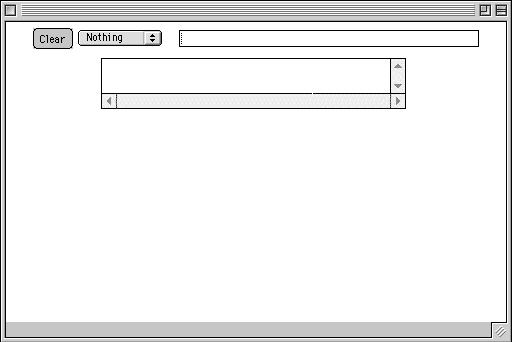
This frame is more interesting than Scribble, since it has four objects;
a "Clear" button, a "Choice" menu, a "TextField" where the user can type
input to the program, and a scrollable "TextArea" that reports events
as the user types and clicks the mouse. The x and y coordinates of a mouse
click are reported in the TextArea by the program whenever a mouse click
event occurs.
The general form of a Java applet is summarized below (details of the
program Skeleton.java can be seen in the complete program listing).
import java.applet.*;
import java.awt.*;
import java.awt.event.*;

public class Skeleton extends Applet implements MouseListener, ActionListener,
                                                ItemListener  {
// Variables used by the Applet -- this is the global "state" of the interaction
     int last_x = 0;              // x-y coordinates of the first click of a pair
     int last_y = 0;
     int click_number = 0;        // most recent click for the current choice
     String currentChoice = "";   // the current user-selected shape
     String currentMessage = "";  // the current user-typed message
     Button clear_button;
     Choice user_choices;
     TextField user_typing;
     TextArea echo_area;

// Initializing the Frame -- this establishes the objects and their listeners
   public void init() {

     // Add a mouse listener in the frame
     // Add a button and its action listener to the frame
     // Add a choice (menu) and its item listener to the frame
     // Add a textarea, label, textfield, and action listener to the frame
   }

// Event handlers for mousePressed, mouseReleased,... events

// Event handler actionPerformed, for Button and TextField events

// Event handler itemStateChanged, for Choice (menu) selection events
}
Exercise this program a bit, using the accompanying document Interactive Java Programming
as a reference, and use it to help you answer the following questions.
- What is the purpose of the statement
echo_area.setText("Mouse Clicked at " + e.getX() + ", " + e.getY() + "\n");
in the mouseClicked event handler? What do the expressions
e.getX() and e.getY() represent in this statement?
- What statements in the program create the choices
"Rectangle", "Message", and "Nothing" and place these choices on the applet?
- What statement activates a listener for these choices so that they
can be handled?
- What method handles a choice selection, and what does it do in response
to such a selection?
- What happens on the screen when you click the mouse in the drawing
area, and what statements cause that to happen?
- What happens when the user types the phrase "Hello World!" in the
User input area? What variables in the program are affected by this event?
Part 3 - Design a Simple Drawing Tool Program
Using what you have learned from the above exercise, along with
some of the graphics ideas that you learned when exercising the scribble.java
applet, design a Java program that allows the user to draw and label
stick figures like the one shown below.
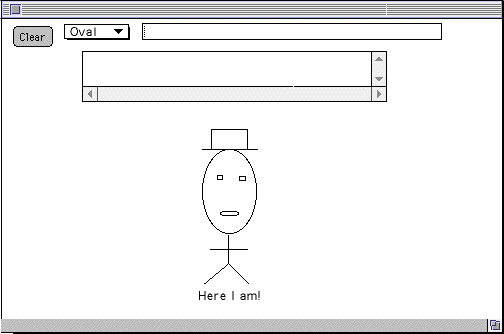
Looking carefully at this handsome figure, you can see that the user has
created it by combining several simple shapes -- lines, rectangles, and
ovals -- along with the text message "Here I am!". For example, the hat
is a combination of a line and a rectangle, the mouth is an oval, and so
forth.
How can the user select the location and size of a simple shape to be drawn
in the frame? One way is to ask for two mouse clicks, which define the
upper left and lower right corners of a rectangle, or alternatively the two
endpoints of a line, and so forth. The x-y coordinates of each click are
captured by the mouseClicked method. The distinction between the
first and second click is made by the global variable click_number
, which is 0 when the first click has been made and 1 when the second
click has been made for a particular shape.
- Describe a series of user-initiated actions (events) that will allow
the user to interact with this interface and draw just the hat.
- Describe another series of events thtat will allow the user to draw
the head.
- Do the same for drawing the torso and two legs
- What are all the possible alternative responses that the mouseClicked
handler should make in response to a single mouse click?
- What specific actions should be made in response to a single selection
in the user_choices menu?
Keeping these scenarios in mind, change the design of the user_choices
object so that it includes all the options needed for drawing these
different shapes in the frame. Similarly, change the design of the
mouseClicked and itemStateChanged methods so that they
respond properly to any reasonable series of events initiated by the user.
Optionally, you may wish to add color to the capabilities of this tool.
That is, a second Choice menu can be added so that the user can select
a new graphics color. Whenever a shape is selected, the user could also
select a new color for that shape, so that it will be drawn with the color
selected, rather than with a black line.
Part 4 - Run the Program and Interact with It
When you are finished, your running program should allow users to
draw stick figures like the one shown above, as well as more elaborate
designs.
Part 5 - Optional (extra credit)
Add functionality to your interaction so that users can draw in
different colors, selected from a menu of color choices, separate from
the user_choices menu of shapes.
Add functionality to your interaction so that the user can erase
the most-recently-drawn shape in the stick figure. (A difficult
variation would be to allow the user to erase any number of recently-drawn
shapes, one-by-one, all the way back to the first one drawn.)
Lab 8 Deliverables:
This lab provides a good opportunity for collaboration; you should
feel free to work together in teams of two to complete it. If you work
as a team, you may also answer the questions in parts 2 and 3 together.
This program file should be renamed lab8<yourname>.java
, where <yourname> is the name of your personal
Arctos e-mail account. Submit your program electronically by dragging
it to the Drop Box in the CS105 (Tucker) folder server on
your desktop. Hardcopy answers to the questions in Parts 2 and 3 of
this lab, along with a hard copy of this program, should be turned in on
the due date.